
Greyboxing the Spatial Web
How I Built the Logic for a 3D Property Explorer

Introduction: The “Dollhouse” Problem
Most real estate websites are stuck in 2D. You scroll through a carousel of images—kitchen, bedroom, bathroom—but you lose the mental map of how these rooms connect.
I’m building a solution that places the user inside the context.
In this post, I’m breaking down the technical foundation of my latest experiment: an interactive 3D property explorer built with Next.js, React Three Fiber (R3F), and Framer Motion.
Currently, this project is in the “Greybox Phase.” Before implementing heavy, photorealistic scans (Gaussian Splats), I needed to solve the hardest part of spatial web design: The Camera Logic.
The Challenge: The “Director” Camera
In a standard 3D viewer, you give the user OrbitControls and let them spin around aimlessly. For a product experience, that doesn’t work. We need to guide the user.
I needed a system that could:
Start at a “Macro” view (The Neighborhood).
Smoothly transition to a “Micro” view (The Unit) on interaction.
Handle the math so the camera movement feels weighted and cinematic, not jerky.

The Solution: The SelectToZoom Wrapper
Instead of hard-coding camera animations into every object, I created a wrapper component called SelectToZoom. It acts as a logic layer that sits between the 3D Canvas and the scene content.
Here is the core logic that handles the interpolation (movement):
function SelectToZoom({ children, isClicked }) {
  const { camera, invalidate } = useThree();
  const targetCameraPosition = useRef(new THREE.Vector3(100, 80, 70));

  useFrame(() => {
    // 1. Determine Target
    if (isClicked) {
        // Zoom in: Move closer and slightly up for a better angle
        targetCameraPosition.current.set(0.8, 1.6, 3.8);
    } else {
        // Reset: Move back to the neighborhood view
        targetCameraPosition.current.set(-5, 1.5, 10);
    }

    // 2. The Math (Linear Interpolation)
    // “lerp” allows us to move 10% of the way to the target every frame.
    // This creates a smooth “ease-out” deceleration effect.
    camera.position.lerp(targetCameraPosition.current, 0.1);
    camera.lookAt(0, 0, 0);

    // 3. Performance Optimization
    // Only request new frames if the camera is still moving
    const remaining = camera.position.distanceTo(targetCameraPosition.current);
    if (remaining > 0.02) invalidate();
  });

  return <group>{children}</group>;
}
Why this matters: By using lerp inside the useFrame loop, the camera creates a natural “ease-out” effect. It starts fast and slows down as it arrives, mimicking how a physical drone might fly.
Bridging the Gap: The Hybrid UI
A common mistake in WebGL is trying to render everything inside the canvas. Text in 3D space is often blurry, hard to read, and inaccessible to screen readers.
I used the “Sandwich Method.”
Bottom Bun: The 3D Scene (R3F).
Filling: The Logic.
Top Bun: The HTML Overlay (
drei/Html).
I utilized the <Html> component from @react-three/drei to inject standard DOM elements into the 3D scene. This allows the “Property Details” card to track the 3D building position, but render as sharp, selectable HTML.
// Inside the Apartment Component
<Html distanceFactor={6} zIndexRange={[110, 0]}>
    <div className=”apartment-info-container”>
        {/* Standard Tailwind + Framer Motion Overlay */}
        <motion.div
            className=”backdrop-blur-xl border border-white/10 ...”
            layoutId=”sale-card”
        >
            {/* Content goes here */}
        </motion.div>
    </div>
</Html>
This enables me to use Framer Motion for the UI transitions (the layoutId prop is magic for morphing elements) while keeping the 3D scene performant.
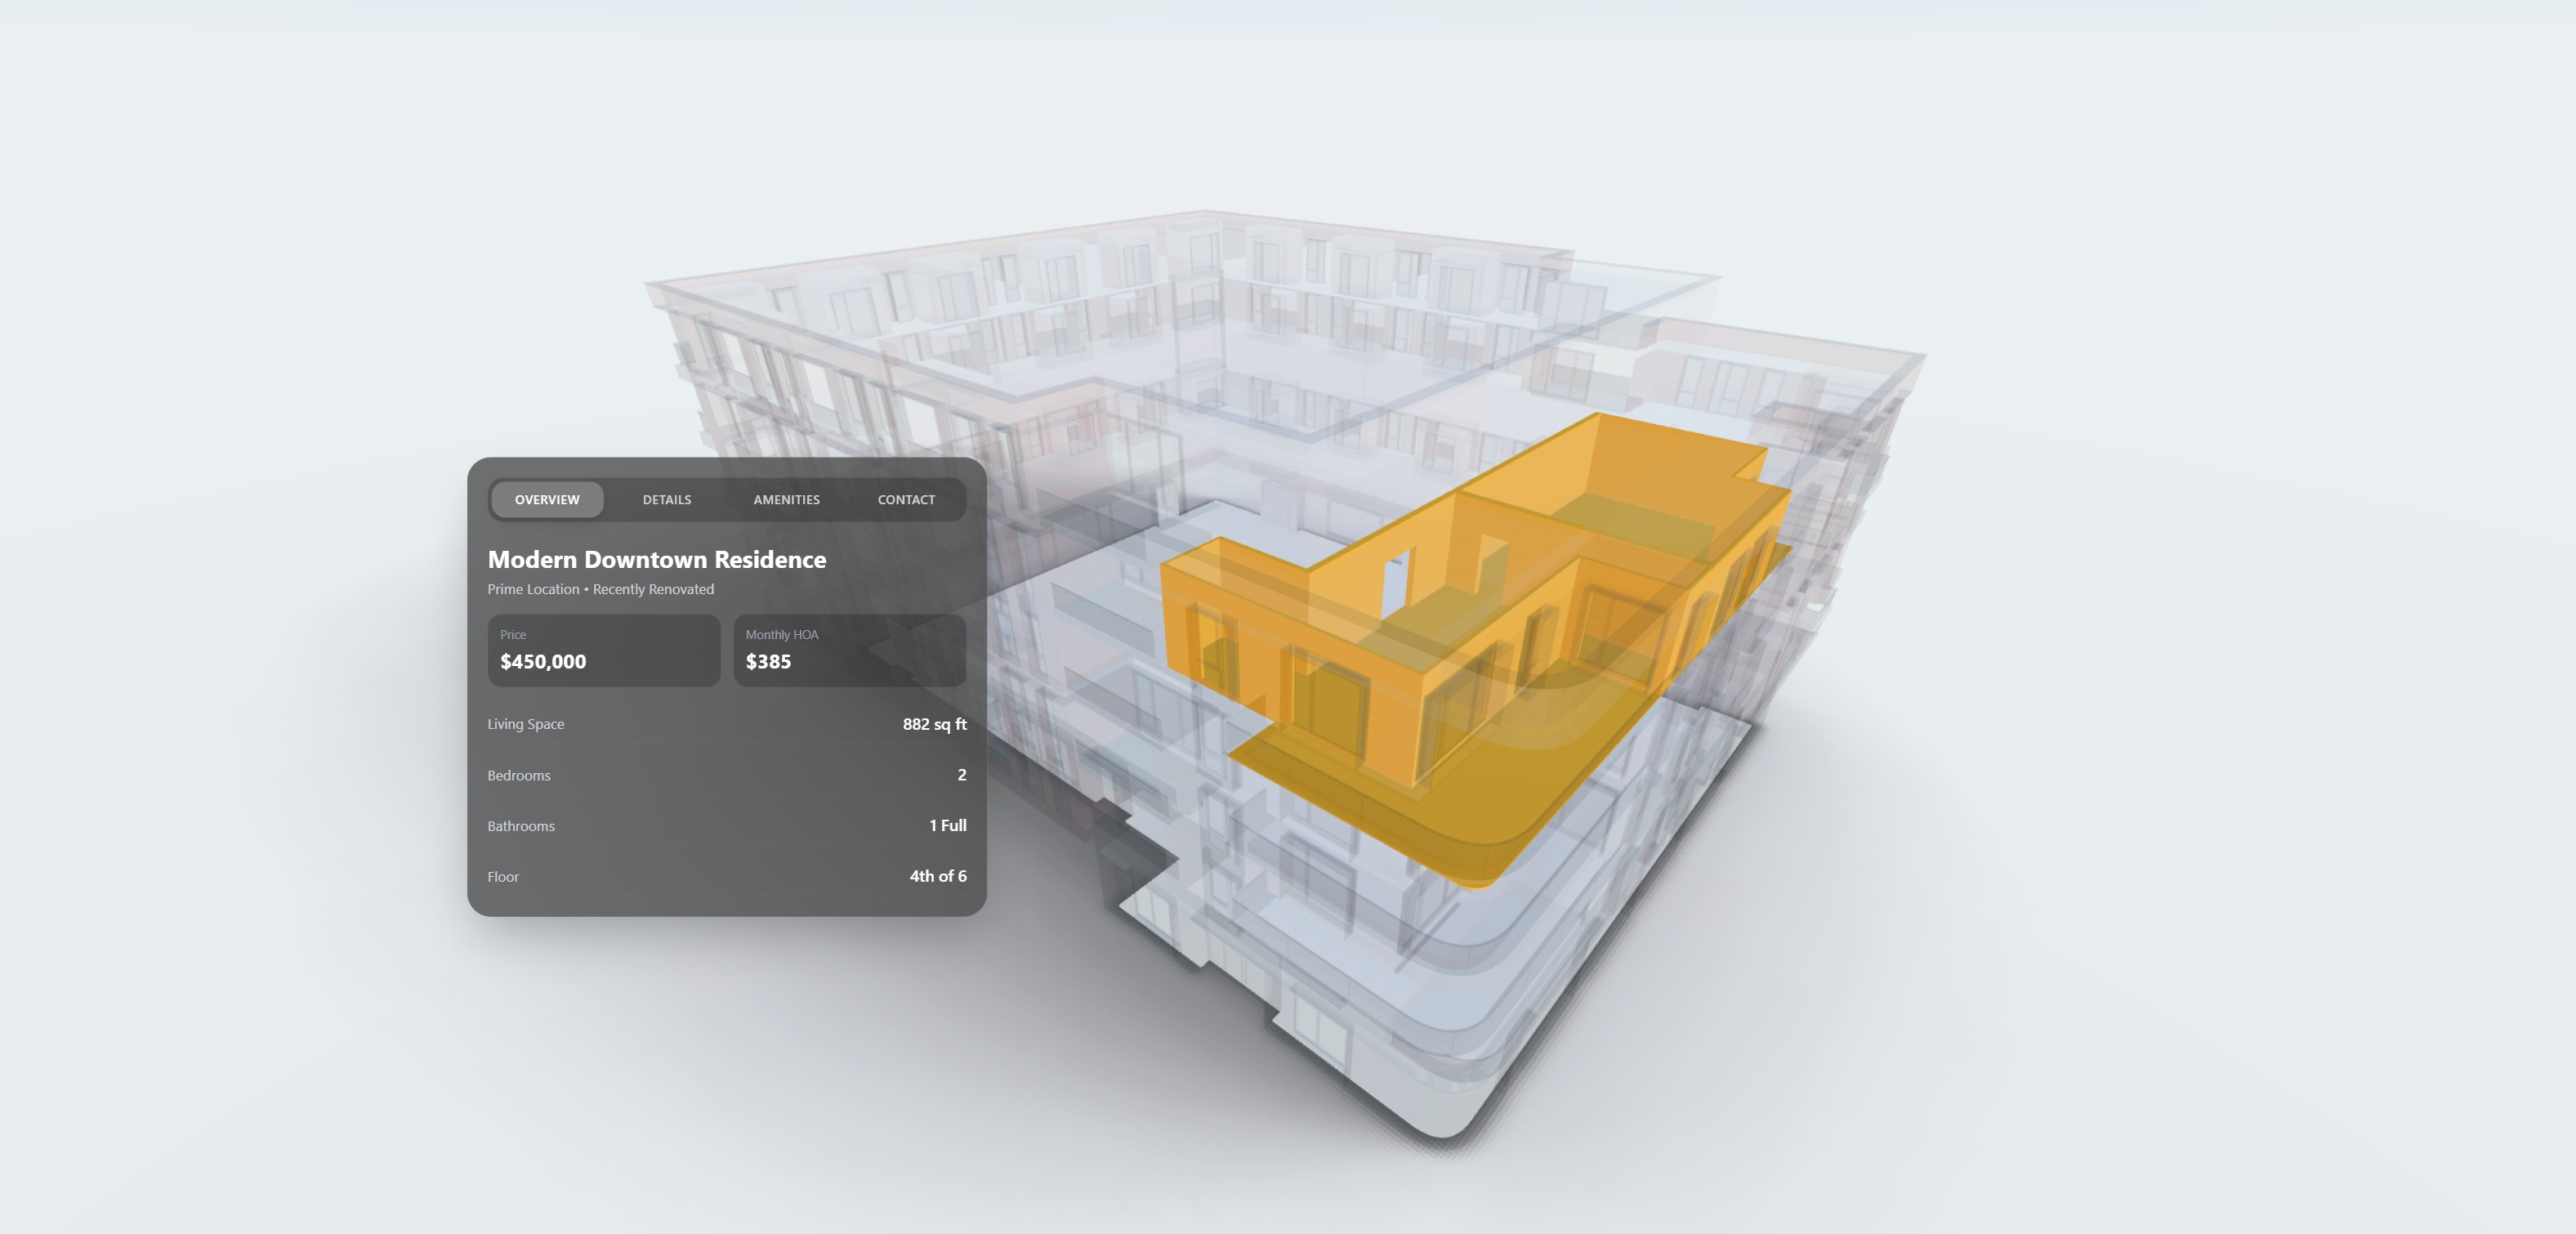
State Management: X-Ray Vision
Visual clarity is key. When a user clicks the apartment, I don’t just zoom in; I need to declutter the view.
I implemented a traversal logic that creates an “X-Ray” effect. When the unit is selected, the surrounding building fades out, isolating the target.
useEffect(() => {
    if (groupRef.current) {
        groupRef.current.traverse((child) => {
            if (child instanceof THREE.Mesh) {
                // If we are focused, turn the rest of the building into ghost geometry
                child.material.opacity = buttonIsClicked ? 0.05 : 1;
                child.material.transparent = buttonIsClicked;
            }
        });
    }
}, [buttonIsClicked]);
What’s Next: From Low-Poly to Reality
This prototype proves that the interaction architecture works. The camera flows, the state manages the view, and the UI is responsive.
Now, we upgrade the assets.
My next step is to replace the orange “proxy” mesh with Gaussian Splatting. I am currently capturing drone scans of real properties. The goal is to use the exact same logic you see above, but instead of flying into a low-poly box, the user will fly seamlessly into a photorealistic, volumetric scan of the interior.
Subscribe to follow the progress as I integrate the .splat files into this React three Fiber environment.